This tutorial demonstrates how to send scheduled messages to Slack. For this example, we’ll be posting an inspirational quote that we retrieve from a free public Rest API. However, you could substitute that with any message source you want to post to your Slack channel, for example, a database, or a social media feed.
We will schedule the inspirational quote to be sent to a Slack channel every weekday morning. The nicely formatted message includes a convenient link to search for information on the quote’s author. Here’s an example of the expected result:

Setting up Slack to Receive the Scheduled Messages
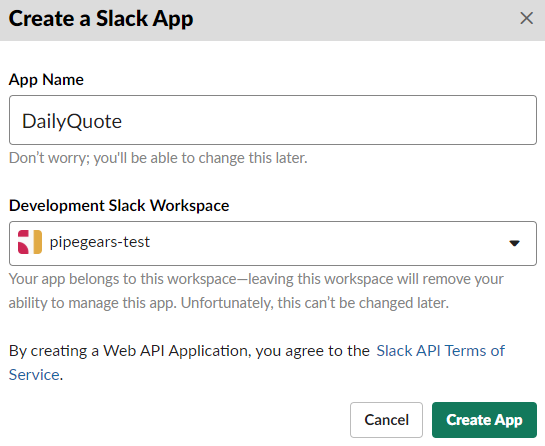
The first step to enable any integration is to create a Slack app at https://api.slack.com/apps. Let’s call the app DailyQuote:
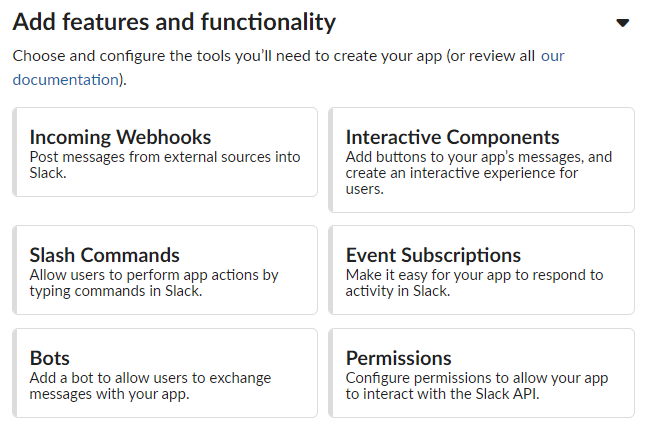
Once you click “Create App” you’ll need to select which features to enable for the Slack app. The simplest way to send messages to a Slack channel is to enable an incoming Webhook in your app. To do this, you click on “Incoming Webhooks” in the features and functionality section of your app once it’s been created.
Then “activate” Webhooks and add a new Webhook to the workspace:

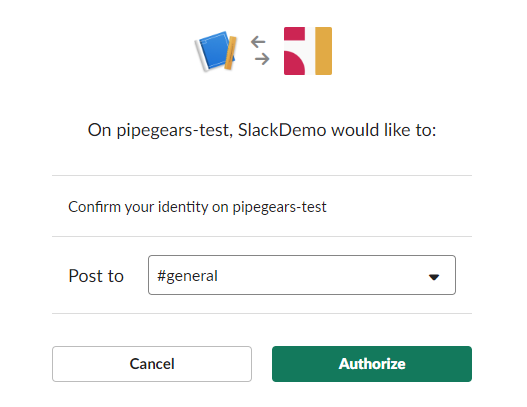
Every Webhook is bound to a specific channel. If you want to send messages to multiple channels, you can create several Webhooks. Alternately, if this becomes unwieldy, another approach is to use the Slack Web Api which allows you to select channels dynamically. We’ll stick with the Webhook approach for this tutorial since it’s a bit simpler and satisfies our needs. For this example, we’re configuring the Webhook to post to the #general channel. The last step is to “authorize” the Webhook. And that completes the Slack configuration.
We now get a unique URL to send scheduled messages to our Slack channel. You should note that this URL includes embedded access tokens and anyone could use it to post to the channel. Therefore it’s a good idea not to share it publicly.
https://hooks.slack.com/services/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
The Webhook URL accepts HTTP POST requests with a JSON formatted request body. This body contains the message to send to the channel. Example:
{
“text”: “This is the message payload”
}
The Daily Quote API
Let’s take a look at the simple quote API we’re using. It’s an API from http://forismatic.com/en that provides a random inspirational quote from a famous person. The API endpoint URL looks like:
http://api.forismatic.com/api/1.0/?method=getQuote&format=json&lang=en
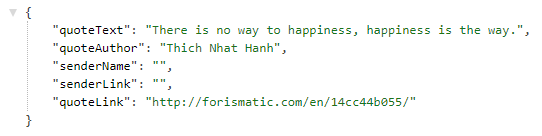
Issuing a GET request to this API yields a response like the following example:
Implementing the Message Scheduler
We implement the message scheduler and sender logic outside of Slack, in this case, on the PipeGears platform. PipeGears lets us build a serverless backend to run the business logic for the integration. We’ll use it to schedule a recurring task that:
- Executes at a specific time based on a schedule
- Issues an HTTP request to the API
- Parses out and encodes the inspirational quote
- Creates a JSON message in the correct format for Slack
- Triggers the Slack Webhook to post the message
- Alternately, sends an email message in the event of a failure
The overall flow looks like this when configured:
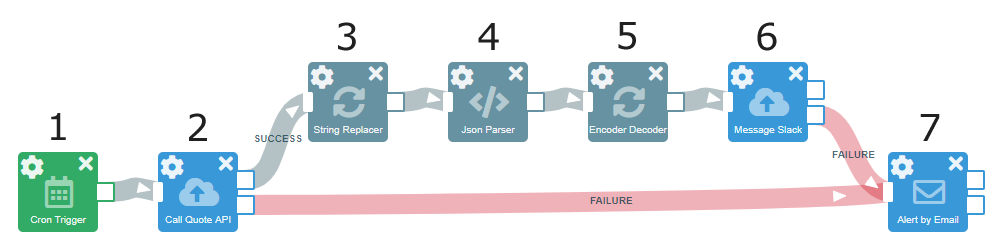
Now we’ll dive into the specific configuration for each module within the flow.
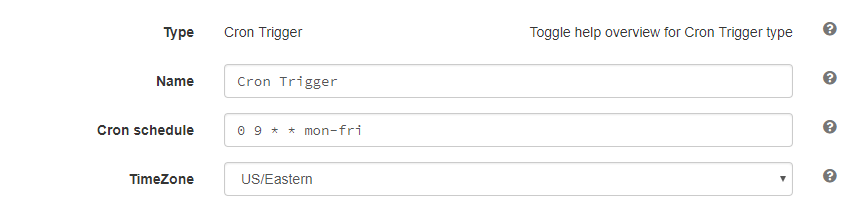
Step 1: Cron Scheduler
The cron trigger lets us create self running processes that execute based on a specific schedule. You define cron schedules with five entries, each representing a time segment as follows:
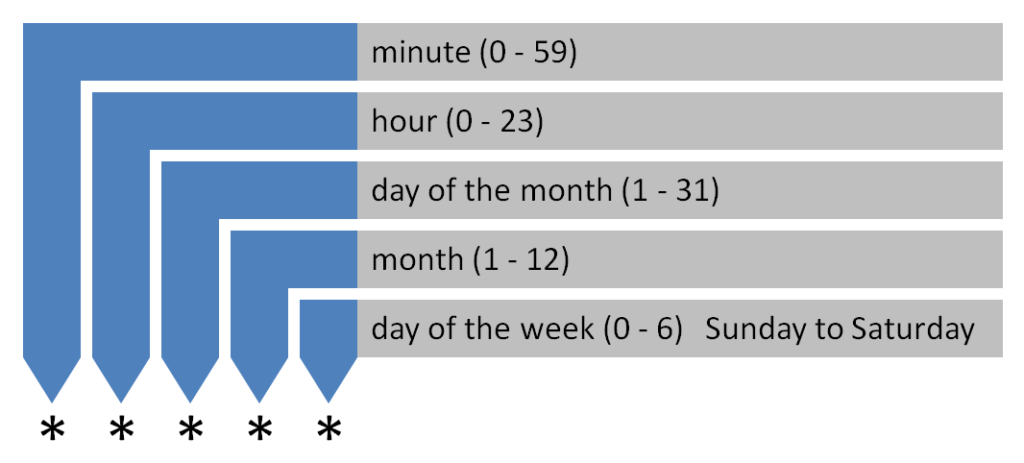
In this case we’ll set the scheduler to execute at 9am every weekday, but not on weekends.
Step 2: HTTP Request to API
The next step in the flow is to make an HTTP request to the API. The configuration is fairly straightforward and done by pasting the API URL into the HTTP Request editor:

After the request executes, the response from the API is accessible in a field named: http.response.body. This field is available as an input to all subsequent modules within the flow.
Step 3: String Replacer
During our testing we noticed that the API erroneously escapes single quotes ‘ with a backslash. Example:
{
“quoteText”:”Some people thrive on huge, dramatic change. Some people prefer the slow and steady route. Do what\’s right for you.”,
“quoteAuthor”:”Julie Morgenstern”,
“senderName”:””,
“senderLink”:””,
“quoteLink”:”http://forismatic.com/en/8eb69e1377/”
}
This single-quote escaping produces invalid JSON syntax which will cause parsing errors. To correct the issue we can do a string replacement operation before attempting to parse the JSON message received from the API. The string replacement will replace all escaped single quotes: \’ with an un-escaped single quote: ‘. The input for the string replacer is simply the response body from the HTTP request we just did on the API. It’s referenced with the http.response.body field:

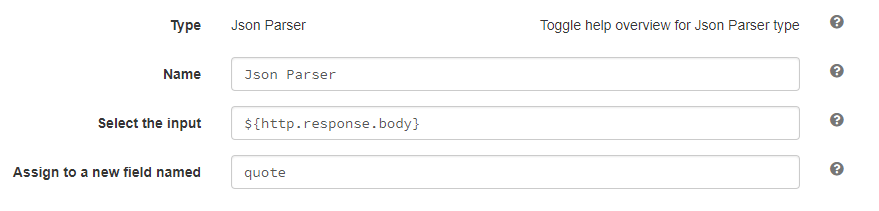
Step 4: Json Parser
Now we’re ready to parse the JSON response and make it accessible to subsequent modules in the flow. We use the http.response.body field as our input again, but this time it will have been un-escaped. The parser will flatten all elements in the JSON object and make them accessible from a new field named quote. This name is arbitrary, but we’ll need to reference it in subsequent steps. For example, the quoteText element in the JSON object we received will be accessible with the field named quote.quoteText
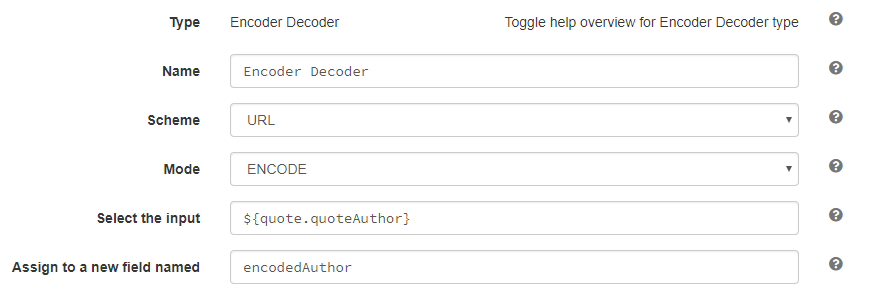
Step 5: URL Encoder
The inspirational quote message that we send to our Slack channel will include a link to search Google for the quote author. We want to create a link with a search term that looks like this:
https://www.google.com/search?q=Alfred+Tennyson
However, in order to format the link correctly, the query term (in this case, the quote author) must be URL encoded. Specifically, we need to convert the whitespace between the first and last name to a URL friendly encoding, which happens to be a + character. To do this, we use the encoder module and create a new attribute which is the url encoded version of the quote author. We assign it to a new field named encodedAuthor.
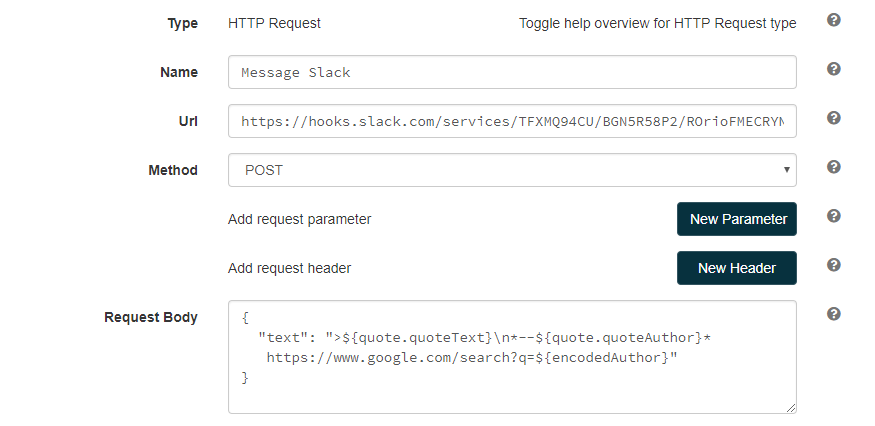
Step 6: Send Message to Slack
We’re ready to send the message to Slack by making an HTTP POST to the Slack Webhook we created earlier. The HTTP Request module allows us to format the message before sending it. Here’s the message we will send to Slack:
{
“text”: “>${quote.quoteText}\n*–${quote.quoteAuthor}* https://www.google.com/search?q=${encodedAuthor}”
}
Slack expects a JSON object with a text element to display as the message body in the channel. It also provides some basic formatting options. In this example we’ve used the > symbol to format the quote as a quote. We also use the * symbol around the quote author to apply bold formatting. Finally, we add a newline character \n to display the quote author on a separate line. We reference the quote text with the field name quote.quoteText, the un-encoded quote author with the field name quote.quoteAuthor and the URL encoded author for the search link with the field named encodedAuthor.
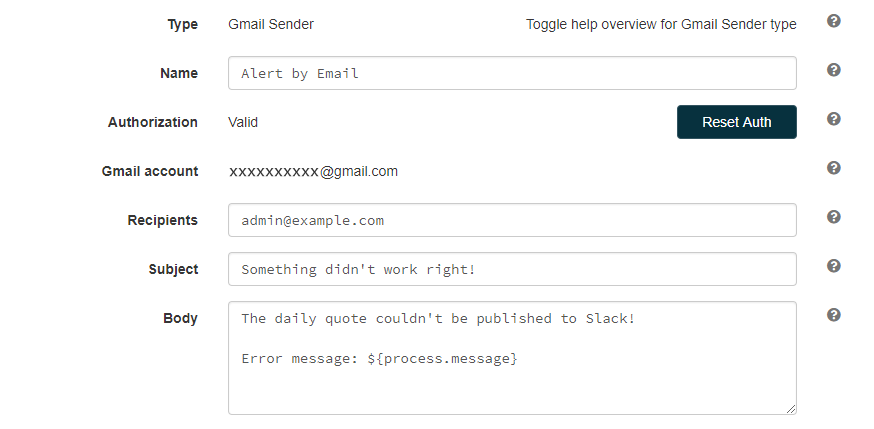
Step 7: Send Alert by Email in Case of Error
The last step in the flow sends an alert message if an error occurs while retrieving the quote from the API or sending the request to the Slack Webhook. The Gmail module links to an existing Gmail account with OAuth and allows you to send emails from that account.
Conclusion
You can use this same approach to schedule and automate messages to Slack channels from any source, whether another 3rd party API, or an internal system like a database, or status updates from social media accounts. You can also create multiple triggers within a single PipeGears application, giving you the flexibility to accomplish almost any type of integration. The best part is that PipeGears flows are serverless and don’t require any coding, so just about anyone can build them.